How to Create Pre-Designed Templates
Here's a simple breakdown of the process regarding adding Templates in product designer within the ScalePrint Designer & Variants admin panel and your Shopify store:
-
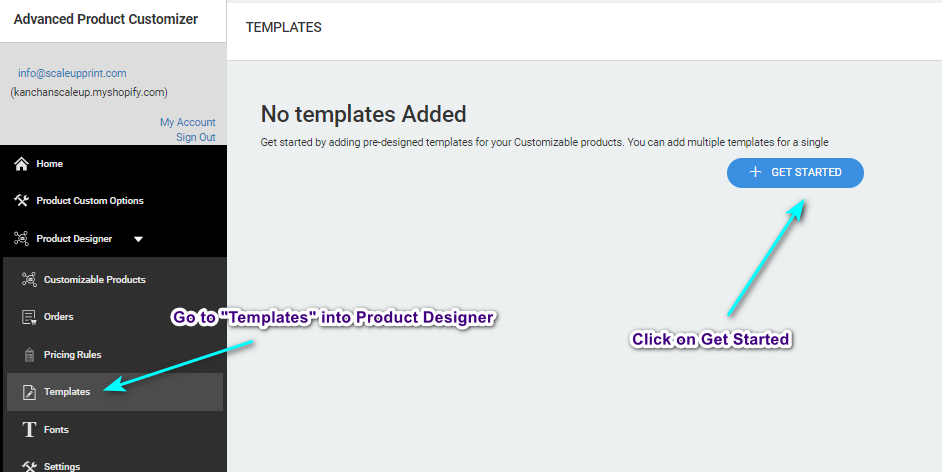
Access Templates
Go to the "Product Designer" section to access templates. Once there, you'll see a variety of templates available. Click on the "Get Started" button to begin working with templates.
-
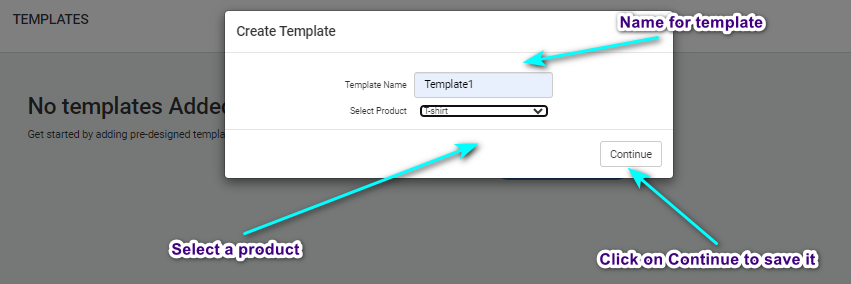
Save Template Information
After selecting a template, a popup window will appear. In this window, you'll need to provide a name for your template and choose the specific product for which you're creating the template. Once you've entered this information, click on "Continue" to proceed.
-
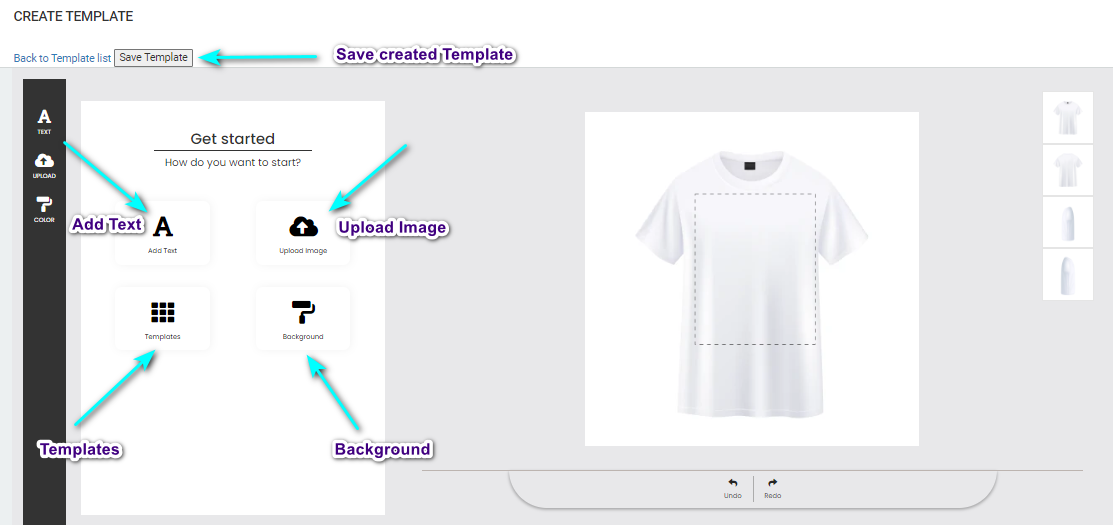
Customize Template
You'll be directed to a new page where you can customize your template. Here, you can add text, images, backgrounds, and other elements to personalize your template according to your preferences. Take your time to adjust styles and design elements until you're satisfied with the result.
-
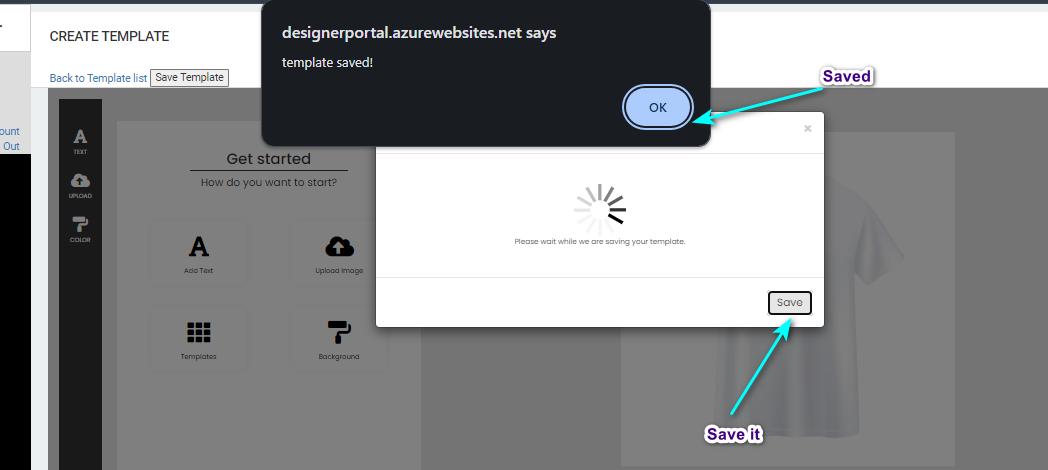
Save Template
Once you've finished customizing your template, look for the option to save your work. Typically, there will be a button or link labeled "Save" or "Save Template." Click on it to save your newly created template.