How to Add Multiple Sides in a Customizable Product
Here's a simple breakdown of the process regarding adding multiple sides in customizable product within the ScalePrint Designer & Variants admin panel and your Shopify store:
-
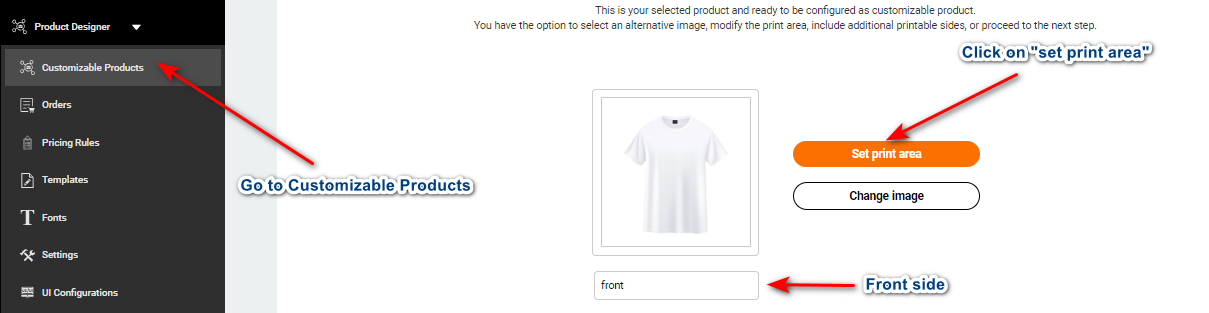
Select Your Product
Go on customizable products in product designer then select the product which needed to customizable then it will open new page for customize your product here select the "set print area".
-
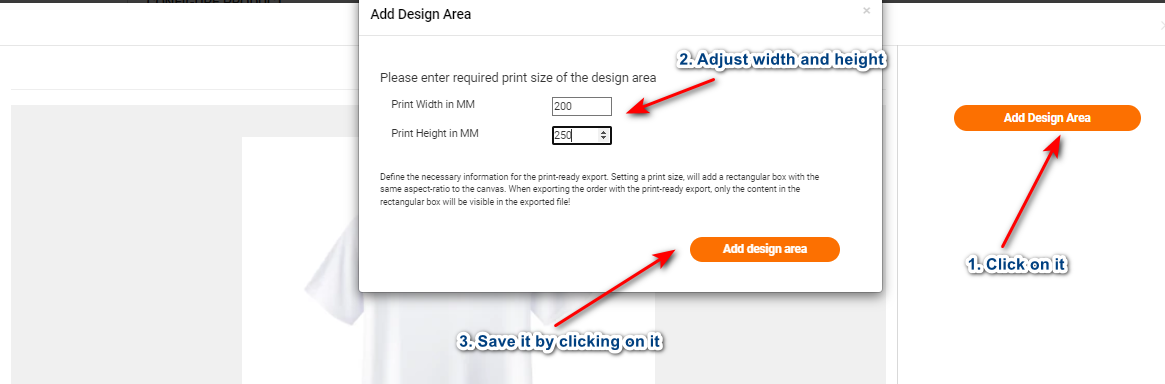
Set Design Area
After clicking on "set print area" it will open a pop up here you can see "add design area" click on it it will open a new pop up where you can adjust its width or height in MM.
-
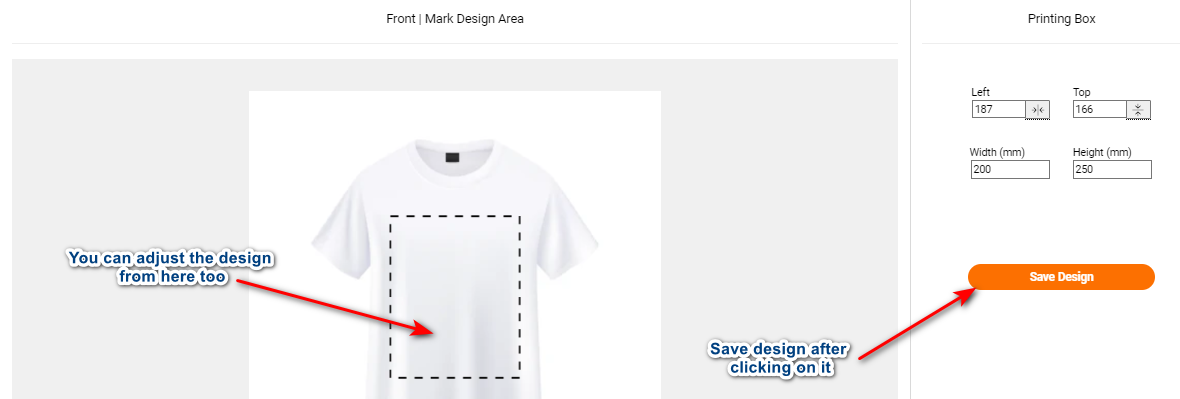
Save Your Design
Now it will open a pop-up where you can see your product where you can adjust more your design area then click on "save design", it will save your design.
-
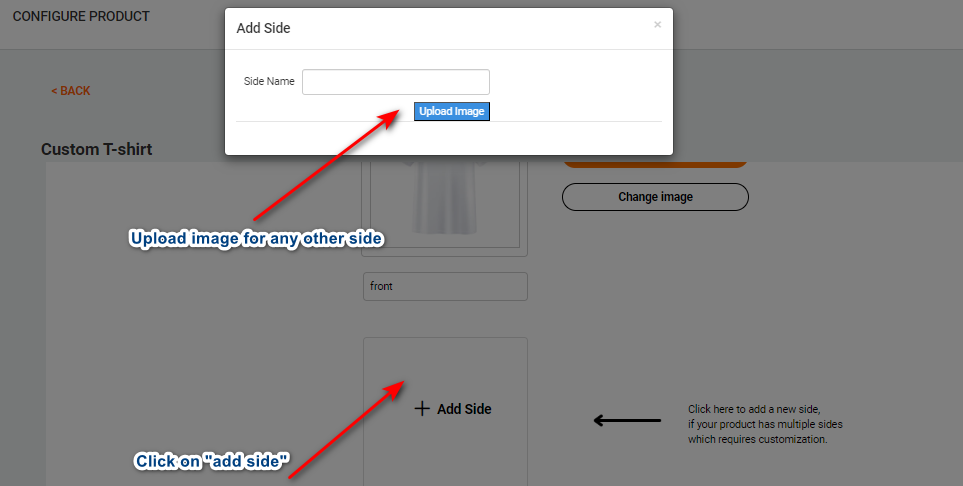
Add More Sides
After creating this, scroll it you can find out option for "add side" click on it then it will ope a popup for for uploading image for other sides. Repeat this for adding all your sides.
-
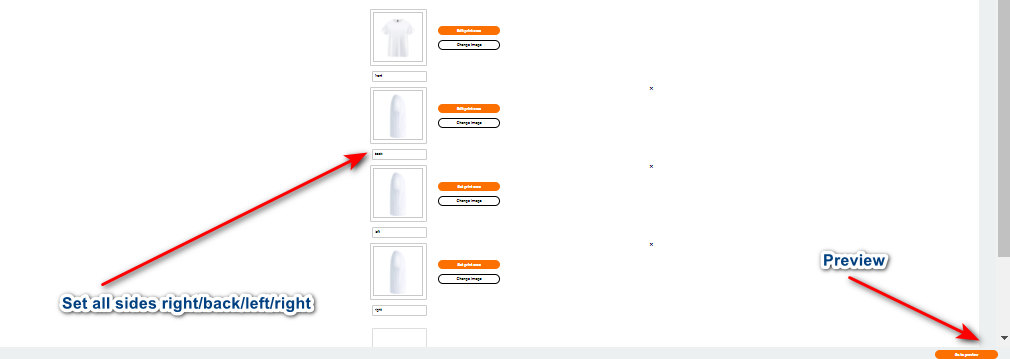
Set Multiple Sides
Set all the possible sides as you needed in your product such as front/back/left/right. You can preview too your product.
-
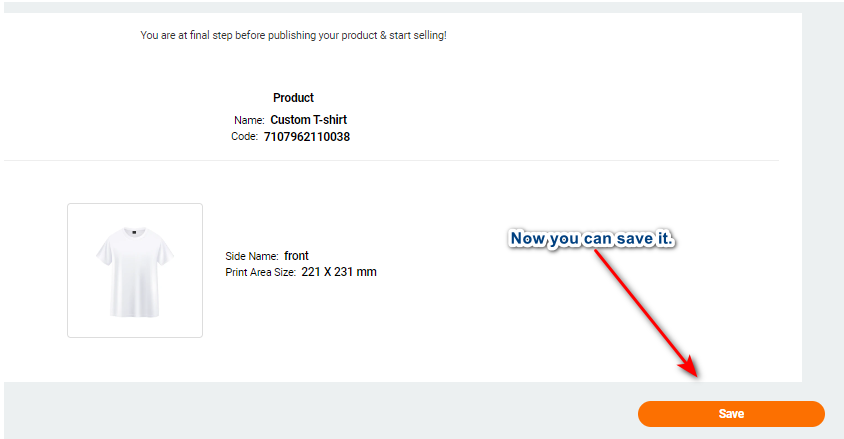
Preview and Save
After previewing the design you can see a "save" button click on it and save your design.
-
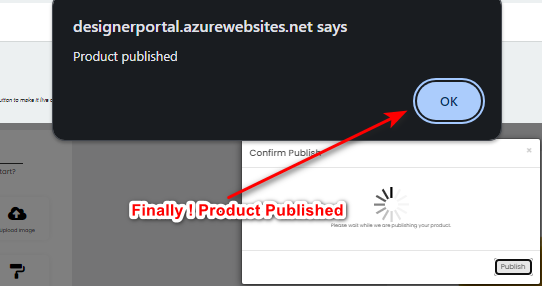
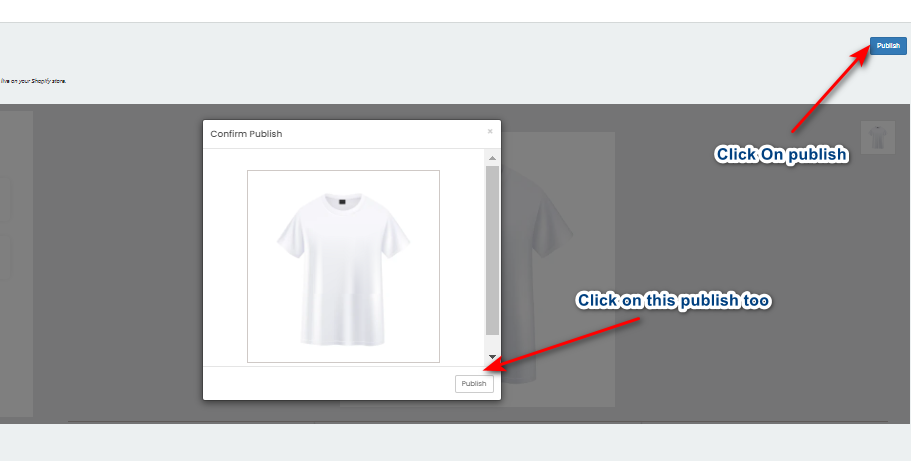
Go on Publish Page
After clicking on save you can see a publish page click on publish button then it will open a popup which will show your product and ask again for publish click on that.
-
Finally Published
Finally you can a last pop up which is showing that "Product Published" then click on that "OK" . Product is published now.