How to Add Multiple Conditional Logic in a Product
Here's a simple breakdown of the process regarding adding multiple conditional logics in product designer within the ScalePrint Designer & Variants admin panel and your Shopify store:
-
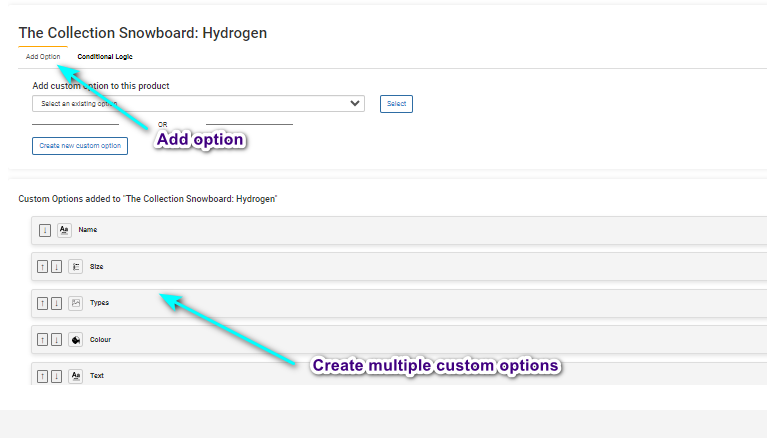
Create Custom Options
Before adding conditional logic, you need to create multiple custom options for your product based on your requirements. These options could include dropdowns, checkboxes, text fields, etc., depending on what you want to offer to your customers.
-
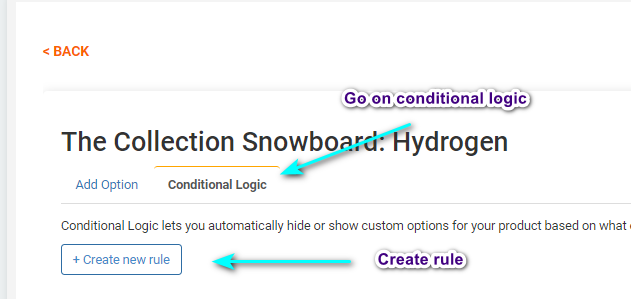
Access Conditional Logic
Once you have created your custom options, navigate to the section where you can set up conditional logic. This might be located within the settings or customization options of your product design tool or e-commerce platform.
-
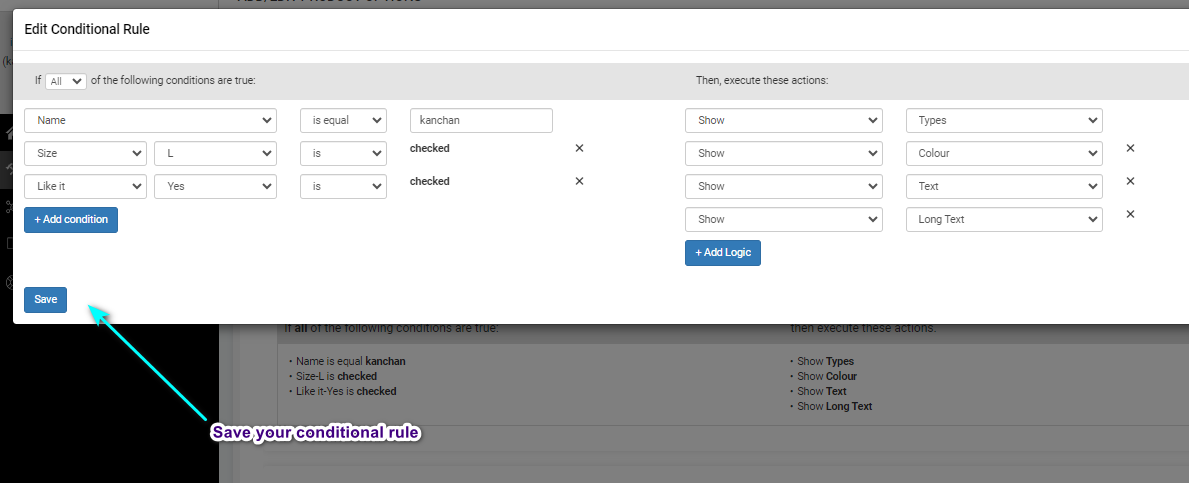
Add Conditions
Start by adding conditions that define when certain options or elements should be shown or hidden based on user selections. For example, you might want to show a specific custom option only if a certain checkbox is selected or if a particular dropdown option is chosen.

-
Define Logic
Next, define the logic that determines how these conditions interact with each other. This could involve show/hide operations to create more complex logic patterns. For instance, you might want to show a certain option only if both Condition A and Condition B are met, or if Condition A is met but Condition B is not.

-
Save Multiple Conditional Logics
Once you have set up all your conditions and logic, make sure to save your changes. This typically involves clicking on a "Save" button to ensure that your conditional logic settings are applied to your product options.